The Randall Museum in San Francisco hosts a large HO-scale model model railroad. Created by the Golden Gate Model Railroad Club starting in 1961, the layout was donated to the Museum in 2015. Since then I have started automatizing trains running on the layout. I am also the model railroad maintainer. This blog describes various updates on the Randall project and I maintain a separate blog for all my electronics not directly related to Randall.
2018-12-29 - Visual Guides & Labeling
Category RandallOne of the issues we were having lately was how to explain to the staff & operators where the trains are supposed to be stopped when they are idle at the station.
The automation computer only cares about the train being on the proper block, but there’s no strong indication of where the blocks start and end. There are no road-side markers, and the gaps in the track can be fairly hard to spot for the non initiated.
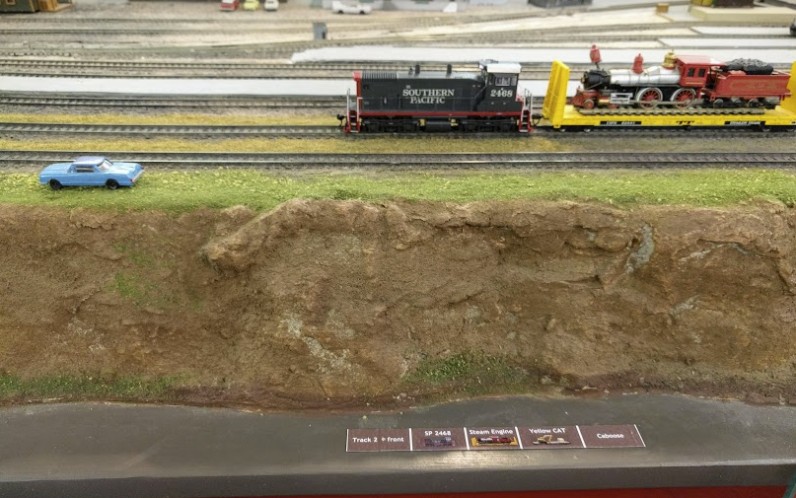
Jim came up with the excellent idea of placing little HO-sized cars where the trains stop. I further added some labels:
Jim added the blue car a few weeks ago. Today I added that label. It’s held on the fascia using double-sided painters tape so it will be easy to remove and update. It indicates both the location, the composition of the train, and very importantly the train composition.
One should note that the stopping position is not exact, nor does it need to be[*]. It will vary between where the blue car is and the label position. But it’s good enough that if someone needs to adjust the train position they can use these as visual guides. [* to be precise, the train just needs to stop before the next block, which starts at the turnout located just to the right, actually visible on the next picture below.]
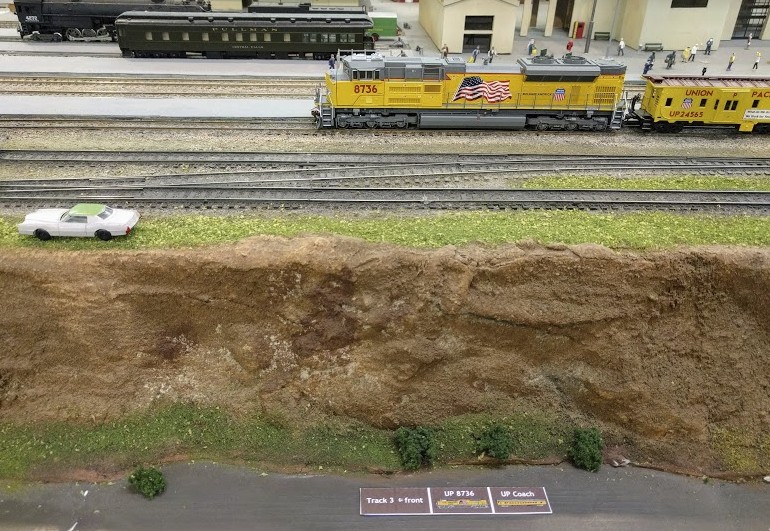
The next train is the passenger train, which we just changed from Amtrak to UP:
Same principle here. The location doesn’t have to be exact, as long as it’s around the white car or the label.
Ironically, just after I had printed that label, on the same day, the yellow coach car we were using started misbehaving so I changed it for a UP caboose we had around. It fits well, but there’s a small mismatch with the label.
Here’s an amusing anecdote: the two labels have the “proper” track numbers, yet not for the reasons most visitors will think. Most people may assume the number indicates the Nth track as seen by the visitors from the edge of the layout. They do not. It’s just a coincidence that they make sense.
On that picture above, the 2 closest tracks are mainline track 1 followed by mainline track 2. So the SP #2468 engine is on “mainline track 2”, which happens to be the 2nd one from the edge. On the picture with the UP yellow train, the 3 next tracks belong to the station, but for some bizarre reason they are labeled from the far to near track. Which means the closest station track happens to be #3, and also happens to be the 3rd track from the edge. Thus the UP label indicating “track 3” is right from both points of view. I made the labels using the actual track numbers, but they happen to match what a non-initiated visitor would think should be the adequate track. It’s nice when little technical details align with reality.
By the way, on the picture above it’s worth pointing out that both the Pullman heavyweight and the cab forward that can be seen are “dummies”. The cab forward does not run (I think it doesn’t even have a motor), and the Pullman has issues that prevent it from being used. But they still look good, and they make good scenery for visitors to observe.

