Model Train-related Notes Blog -- these are personal notes and musings on the subject of model train control, automation, electronics, or whatever I find interesting. I also have more posts in a blog dedicated to the maintenance of the Randall Museum Model Railroad.
2022-10-09 - Fixing the Walthers Mainline SD70ACe
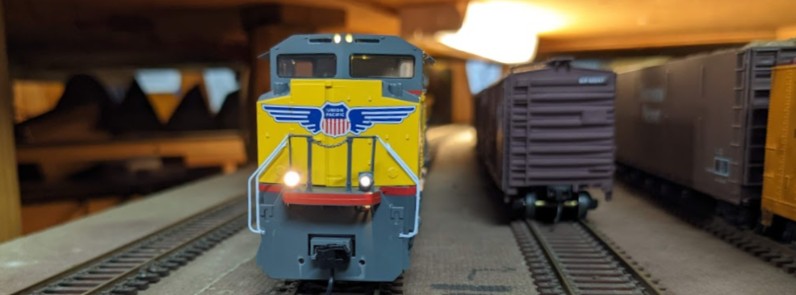
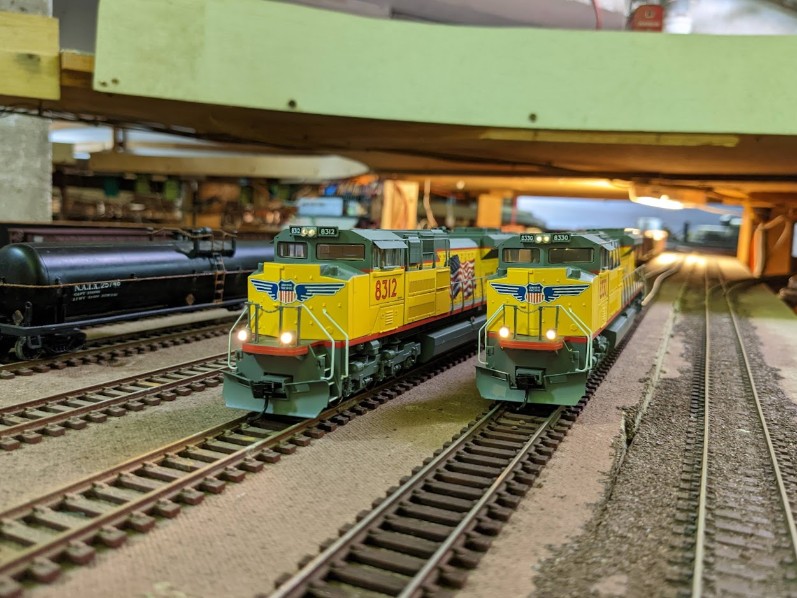
Category TrainI’m preparing two new Walthers Mainline SD70ACe to be the main Passenger Automation engines at the museum. These are Walthers UP #8312 and UP #8330, HO scale, with ESU LokSound decoders.
Disappointedly, out of the box, the engines already require some work:
- The nose numbers plates were loose in the box. Needs to be glued.
- One of the engines’ front snow plow was also loose in the box. The other one was still attached.
- The ditch lights have unequal intensity.
- They make a weird noise when running… something’s definitely very wrong in the rear truck.
8330’s ditch lights are very uneven. Notice the lack of snow plow and number plate.
Gluing the Cosmetic Parts
For the snow plows and the number plate, that’s easy. All I have to do is glue them back in place. How hard can that be?
Jim has a bottle of Zap Thin CA (cyanoacrylate glue, a.k.a. super glue) so I grab that and very quickly realize that thing is dripping… on my fingers. Oh that’s not good. I quickly made sure to separate all my fingers before I got them stuck together , and rushed to the bathroom to wash my hands with lots of warm water and soap. That leaves a hard deposit on CA on a lot of skin, which I’m not fond of, and it takes several days to break down.
Tip: To get rid of cyanoacrylate glue on skin, use vegetable oil or mineral oil at home. I don't have any at the museum, but I have mineral spirit(*) which is also good to break it down. Soak the hardened CA deposit with the mineral spirit and rub it a few minutes, then wash hands again because mineral spirit is not the best thing to keep on the skin. The mineral spirit degrades the CA and eventually the hard CA layer will break down fairly fast (it was gone in an hour). Don’t try to pull it off, just let it break loose over time.
(*) This is California so we don’t have “real” mineral spirits here. We have this “odorless” low-VOC substitute that is, however, as good as the real thing to remove paint and CA from your fingers.
Once I’m done of this sticky mess, I went back to gluing the parts but this time wearing latex gloves and applying the cyanoacrylate glue with a small toothpick -- that Zap Thin CA is very very liquid and there’s no way to get it into the desired spots otherwise. In no time, I had the two engines with their accessories restored properly:
Regarding the ditch lights: these are done using a tiny square LED that is inserted in the light housing from the bottom, from under the walkway. We can see the issue clearly on this close up I took before adjusting them:
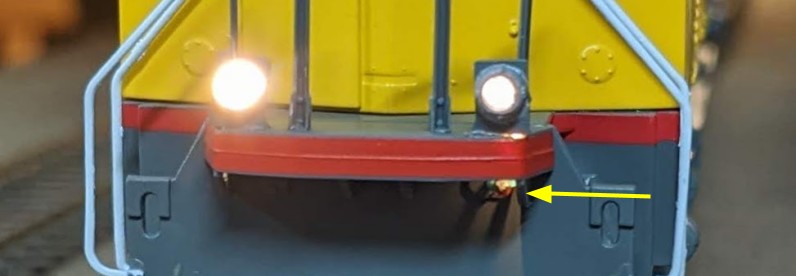
In that picture we can clearly see the two LED wires on the right side. When the lights are turned off, I could clearly see the LED inside via the transparent lens. In this case, the left light was too high and the right light was too low. With thin needles I can adjust them up and down, and then once done I can fix them in place using GE Clear Advanced Silicone II (I use the GE Silicone II, as it doesn’t become acidic like the GE Silicone I does). The silicone dries clear and remains flexible. This is better than CA glue for this case as it means I can remove it later if I need to.
Removing the Shell on the Walthers Mainline SD70ACe
Now it’s time to fix the prominent and worrying gear noise issue on the rear truck, which means I need to remove the shell.
Removing the shell was its own little adventure, which is detailed in Shell Removal: HO Walthers Mainline SD70ACe.
Fixing the Rear Truck Noise
Now we can deal with the core issue…
What causes the rear truck noise on that engine?
I was hoping it wasn’t a broken gear, as this is impossible to replace unless I request exchanges for the entire engine. But then they both had exactly the same issue, and it would be really weird for 2 new Walthers engines to come with broken gears. Or at least I hope so.
Luckily the issue was both obvious, yet totally surprising. I was not expecting to see this:
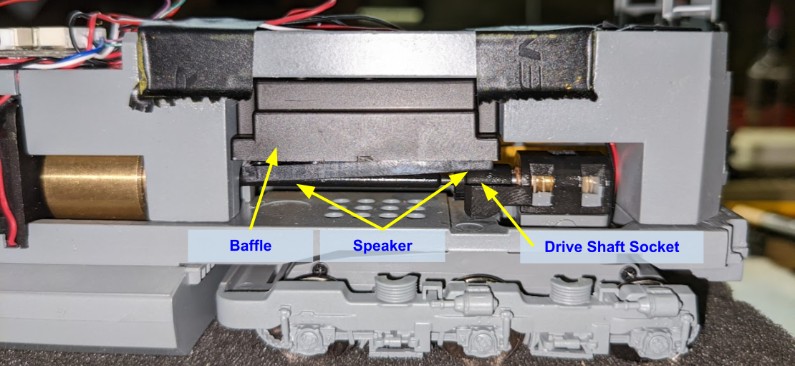
So yeah, the speaker is loose and doesn’t hold in place in the speaker baffle. Because it points down towards the track, the speaker is just falling and resting on the drive shaft. The noise I was hearing is the drive shaft socket hitting the speaker at every single drive shaft rotation. Since it’s an oval speaker, that means it’s hitting just the end of the speaker membrane, where it is glued on its support. Amazing.
I’m glad I opened the engine right away and didn’t try to run it too long on the track. That cannot be good for the speaker.
When I build custom-made speaker baffles for DCC conversions, I generally use GE Clear Advanced Silicone II to hold the speaker in the baffle. When the silicone cures, it holds well to the plastic, and it’s still removeable. Unfortunately here I don’t think I would have been able to easily apply it since there’s not enough clearance to put a thin layer between the speaker and the baffle.
So instead I went for kapton tape to hold the speaker in place. I cut a thin strip of the tape I have at hand and carefully inserted it at both ends of the speaker:
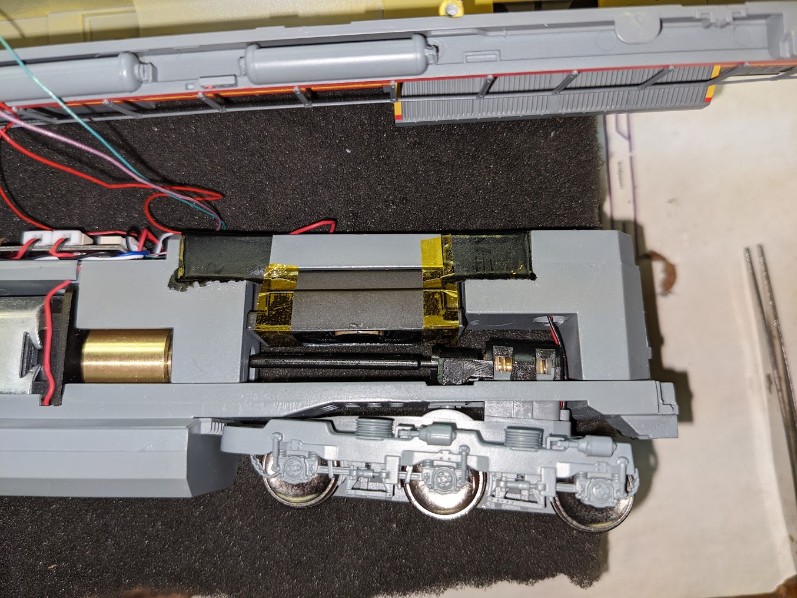
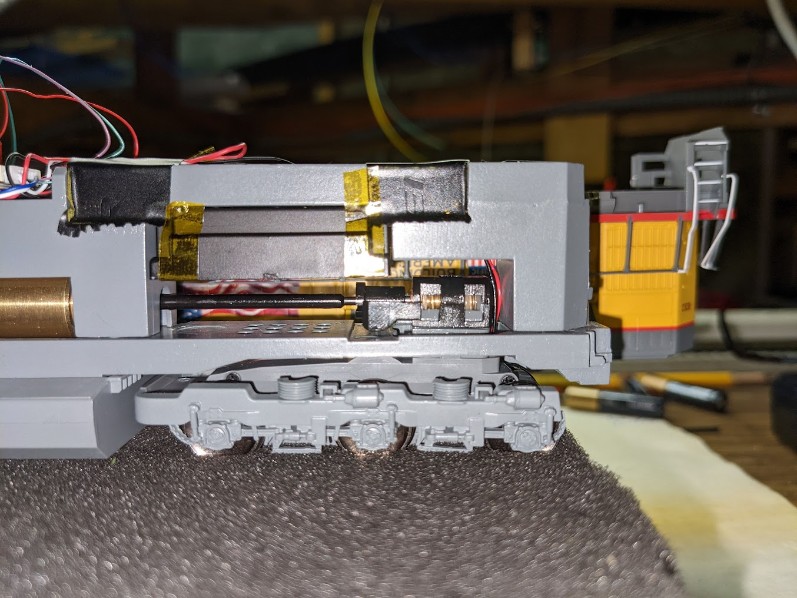
It’s a bit hard to see on the picture, yet now there’s half a millimeter of clearance between the drive shaft socket and the speaker.
After this fix, and after grumbling for 10 minutes while trying to put the shell back on, I had an engine running seemingly silently and very smoothly.
Then I proceeded with the other engine which had exactly the same issue, a loose speaker resting on the drive shaft and hitting the shaft socket at each rotation. I wonder how many people have that defect and can’t hear it or just think it’s part of the DCC sound effect.
Speaking of which, one final note: this is one of these designs with the speaker pointing downwards. I tend to think these give a fairly weak sound. We can clearly see that there are 12 little holes drilled in the chassis in front of the rear worm gear and that’s all the sound has to get out of the engine. It’s not much. The chassis would have allowed plenty of space to put the speaker pointing upwards, but then we know why this isn’t done here: because it would require openings in the top of the plastic shell, and that’s a lot more tooling.
But wait, there’s more… the saga continues here with more issues.