The place where random ideas get written down and lost in time.
2023-06-09 - Rig4j Needs a Rewrite
Category DEVBack there on the RIG 4 Spec [Idea] project page, I have a different angle for a rewrite of Rig4.
The summary is that the current version of Rig4j is still running the “early experiment”. Code base was mostly “feasibility”. When exploring the Rust-based Rig4r, I realized it would be better structured by separating the gdoc functionality from the “rig” generator functionality: one tool does the gdoc fetching, and then Rig works on purely local files.
The new angle is that the gdoc fetching should actually generate izu files, by parsing the gdoc html exports and rewriting them as izu/markdown text files. There would be some limitations on the format. Not all the formatting would make it through.
This would also involve looking at the format I use in the train blog, making an exhaustive list of features used, and try to match some level of parity. Luckily I don’t use too much stuff, but tables seem like they could be tricky, and I’d also want to support the linkable TOCs and their existing hrefs. Some things like usage of titles in article pages did not exist in izu.
I may also want to consider dropping my izu format, and focus on “official” markdown.
I can probably fairly simply translate old izu pages to markdown if such support is needed.
OTOH it would solve one of the current problems, namely that the page format is dictated by the gdoc html export, and that has been known to change substantially over the time.
The end goal is to not have such a strong dependence on gdoc. That makes gdoc merely a convenience to more easily write the izu files, and then the izu files become the “source of truth” that I need to backup.
This is new:
java.lang.RuntimeException: com.google.api.client.googleapis.json.GoogleJsonResponseException: 403 Forbidden
{
"code" : 403,
"errors" : [ {
"domain" : "global",
"message" : "This file is too large to be exported.",
"reason" : "exportSizeLimitExceeded"
} ],
"message" : "This file is too large to be exported."
}
at com.alflabs.rig4.gdoc.GDocHelper.lambda$getGDocAsync$0(GDocHelper.java:491)
at com.alflabs.rig4.struct.GDocEntity.getContent(GDocEntity.java:54)
at com.alflabs.rig4.blog.BlogGenerator.parseSource(BlogGenerator.java:135)
at com.alflabs.rig4.blog.BlogGenerator.parseSources(BlogGenerator.java:120)
at com.alflabs.rig4.blog.BlogGenerator.processEntries(BlogGenerator.java:69)
at com.alflabs.rig4.exp.Exp.start(Exp.java:60)
at com.alflabs.rig4.EntryPoint.main(EntryPoint.java:53)
As usual, that makes me reconsider my dependency on the GDrive API.
2023-06-04 - DaVinci Fusion Fuse
Category DEVHere’s the end result of the Fuse to perform image removal on my train videos:
https://bitbucket.org/alf-labs/lightworks/src/master/fusion/fuses/RalfCamCarRodRemoval.fuse
and here’s an example of the result:
https://www.alfray.com/trains/blog/train/2023-06-04_davinci_resolve_plugin_for_t_4126bb12.html
2023-05-21 - Lua Optimization Tips
Category DEVhttps://www.lua.org/gems/sample.pdf
- Locals are faster to access than globals. Copy globals to locals especially for loop access.
- Tables are composed of an array (storing integer keys from 1..n) and a hash map for any other keys.
2023-05-17 - DaVinci Fusion Plugin
Category DEVHow to write a Fusion video effect plugin?
This SO answer leads to “we suck less” (aka WSL), and “eyeon”.
That last name “eyeon” is the company which originally created Fusion before being acquired by BlackMagic to integrate it in DaVinci Resolve.
- https://www.steakunderwater.com/wesuckless/ is the place to find a community behind plugins.
- API should be available via Help > Documentation > Developer. There’s a PDF IIRC.
- An older version (Fusion 8, 2016) can be found here: https://documents.blackmagicdesign.com/UserManuals/Fusion8_Scripting_Guide.pdf
- Scripting:
- “FusionScript”, to be used either in Lua or Python.
- Uses LuaJIT for performance. Lua is the preferred choice.
- Choice of Python 2 or 3.
- Fuses:
- OpenCL for tools & filters
- Scripts:
- Composition scripts (a “composition” is a full Fusion document)
- Tool scripts (for a “single tool” aka a single node?)
- Bin scripts (as in “media bin”)
- Utility scripts (act on Fusion itself)
- Script libraries (scriptlib, used by other scripts)
- External command-line script which can act on a composition.
- Event scripts.
- Composition callbacks (load, save, render, etc)
- Button callbacks (for UI)
- InTool scripts (executed when evaluating each frame)
Fuses has its own SDK documentation:
- https://documents.blackmagicdesign.com/UserManuals/Fusion_Fuse_SDK.pdf?_v=1658361162000
- Locally as “Fusion Fuse Manual.pdf” in C:\ProgramData\Blackmagic Design\DaVinci Resolve\Support\Developer\Fusion Fuse
- Plugin types:
- Image Processing, with inspector and onscreen crosshair.
- Metadata processing.
- Modified plugins (affects number inputs)
- View LUT plugins.
- Using Lua with LuaJIT.
- What I’d use is an Image Processing “Tool” plugin.
- Plugin has code to register its name.
- Code to register inputs (UI controls) but also Image input/output.
- Callback NotifyChanged when UI controls change (e.g. to adjust UI).
- Callback Process to process an image and compute an output.
- Native methods that apply to the entire image:
- ColorMatrixFull (RGBA offset, scale, etc)
- RGBA Color Gain, Gamma, Saturate.
- Color Space conversion (RGB, HSV, etc)
- Clear/Fill
- Channel operations on 1 image with + - * / and RGB coefficients.
- Channel operations on 2 images with RGB fg vs bg: Copy, Add, Multiply, Subtract, Divide, Threshold, And, Or, Xor, Negative, Difference.
- Transform or Merge (center, pivot, size, angle, edge wrapping)
- Crop, Resize
- Blur (also for Glow)
- Pixel Processing : create functions that take pixels from 2 images and return the resulting pixel.
- Functions are “pre declared” and stored in an array, then used in Process.
- Processing has 8 channels: 4x RGBA and 4x Bg-RGBA (I guess for the background?)
- Shapes: created using MoveTo/LineTo + matrix operations then filled and merged with image.
- Text overlays: font management, then draw as shapes.
- Per-pixel processing using for y/for x/getPixel/setPixel.
- DCTL (DaVinci Color Transform Language) is a shader-style processing.
- C-like syntax, operates om x,y individual pixels.
- Converted to GPU as needed.
- Transform DCTL to change color data in one image.
- Transition DCTL to compute transition between two images.
- OpenFX
- C/C++ shader with VS.Net SLN project.
Some example of Fuses here:
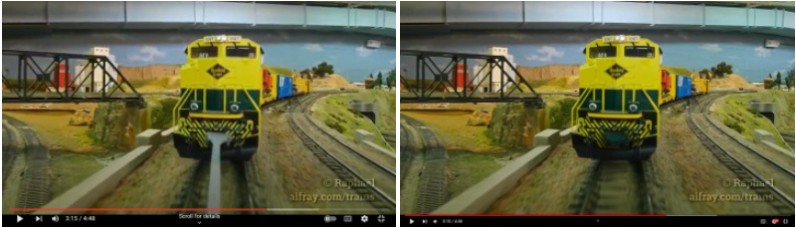
Filming trains with the video car pulled by my “extended” coupler leaves that coupler visible on screen. It’s a tad distracting.
One question I had is: Can I write a Fusion plugin that would “erase” this object?
Let’s look at the obvious part: how would I erase this object?
We can split the problem in two: how to detect the object, and how to erase it.
First, the “coupler” appears as a gray-ish rectangle. It always touches the bottom edge of the screen and extends upwards. It’s roughly centered horizontally, but can move left and right as the train takes on curves. If we had to modify a movie frame by frame, one optimization would be on a given frame the coupler will very close to its position in the previous frame.
The coupler is more or less a vertical rectangle.
If we were operating as a plugin in Fusion, ideally we could use a 2d ui crosshair to define its initial position, but we would also have to deal with the fact it moves slowly from frame to frame, and tracking would be ideal.
If we were operating as command-line script without UI, the initial position could be given as parameters.
Its width is constant. It tapers as it gets farther from the camera, but overall we could parametrize the max/min width we are looking for -- e.g. what looks like a vertical gray box of W pixels wide and at least H pixels height starting from the bottom of the screen, roughly centered?
If we have a UI giving us a starting pixel position, we can use a basic flood algorithm to detect the boundaries.
When looking at a still image capture, the coupler edges are naturally fuzzy. We cannot expect a stark transition between the coupler and its background. However we can parametrize this, as typically the fuzzy border will have a predictable width.
Although the coupler is mostly of the same gray color, that color can vary depending on illumination, not to mention tunnels, and there’s bound to be shade variation across the length of the object.
One option is to look at the image in HSL -- the coupler being gray should not have a hue.
Assuming we can detect the coupler, how do we “erase” it?
One suggestion is to treat the coupler as a mask of width W:
- Shift the image horizontally left and right by W pixels.
- Merge this over the coupler using an averaging algorithm.
- Using the luminance as the coefficient to merge it.
Assuming this works for one image, the obvious concern is how will it look once applied to a 30 fps movie? We may need to do some temporal averaging -- that is apply a percentage of the last frame to smooth the output.
Implementation wise, why kind of framework would be used?
One option is to make a standalone processing app, either in Java/Kotlin/C++, with its own movie decoding + UI rendering. The input movie decoding would take advantage of either ffmpeg or vlc as libraries or avcodec on linux. Similarly this can write a movie result on the fly.
In this mode, we would convert a raw footage upfront -- cam files ar 10 minutes long.
The other option is to use a Fusion plugin as the framework -- in this case Fusion provides the input and the output. Debugging seems potentially more challenging this way. The Fuse SDK doc indicates the Lua code can be reloaded “live” to ease debugging. This has the side benefit that we can judge performance immediately, and that we can take advantage of the fuse UI widgets to e.g. select the initial position to look at or to select some parameters (width, blending, etc).
In this mode, we could apply the tool to only the segments being rendered in the final production rather than on the entire raw footage.
One thing I don’t see in the Fuse SDK is a way for a “tool” to incrementally operate across frames in an animation. We want to do some basic tracking of the coupler position, and it would be nice if it could be automated. The other option is to simply animate the initial position, and/or to use a planar tracker to define it.
2023-02-24 - MQTT
Category DEVJust leaving this here to explore it later: https://docs.espressif.com/projects/esp-idf/en/latest/esp32/api-reference/protocols/mqtt.html
Guides:
- https://learn.adafruit.com/alltheiot-protocols/mqtt
- https://docs.arduino.cc/tutorials/uno-wifi-rev2/uno-wifi-r2-mqtt-device-to-device
Spec for MQTT v5:
This would be useful for SDB: make it an MQTT client.
But potentially that can be useful for other projects.
For example, my current layout stats from Randall are sent via very hackish REST post (hackish in the sense it’s received via a BASH CGI :-p ⇒ not anymore, it’s a CGI py), and it may be better served by using this protocol: e.g. Conductor sending events to home via broker/gateways, and I'd want to better understand the possibilities.
From the adafruit guide above:
- An MQTT broker is a “stable” node to which (potentially ephemeral) MQTT clients connect. It’s basically the “local server” of a bunch of clients.
- Brokers typically have their own local database but they do not have to.
- An MQTT client is any end-point sending or receiving messages.
- Publish: A client sends a message to a broker.
- Subscribe: A client receives messages from a broker.
- A client keeps an open connection to a broker. The connection open/close is lightweight enough that it can be beneficial to open/close it when needed.
- MQTT messages have a fairly lightweight header, designed for lightweight payloads.
- The protocol is mostly transport-agnostic.
- The spec above recommends TCP, TLS, or WebSockets, and recommends avoiding UDP due to lack of ordering guarantee.
- QOS: 0=at most once delivery, 1=at least once delivery, 2=exactly once delivery.
- Messages are sent to “topics”: a hierarchical string e.g. /root/part1/…/partn.
- Concrete example: /building1/sensors/floor1/division2/temperature.
- Subscription can be done using wildcards: + for any given part, and # for “anything till the end”.
- Topics should be carefully defined upfront, as changing the schema later is not trivial especially with regards to wildcard subscriptions.
- An MQTT gateway is a client/bridge translating data from sensors to MQTT messages (example: sensor ⇔ RF/BLE ⇔ gateway ⇔ MQTT messages ⇔ broker).
MQTT Libraries
- Comprehensive list of brokers/clients here https://mqtt.org/software/.
- ⇒ Note that most of the time I want a “client” and not a “broker” (server).
- ESP-IDF has ESP-MQTT.
- ArduinoMqttClient.
- Eclipse Paho MQTT Client Java library.
- https://mvnrepository.com/artifact/org.eclipse.paho/org.eclipse.paho.mqttv5.client/1.2.5 ⇒ Last updated in 2020, seems dead in Java?
- Eclipse Mosquitto open source broker: https://mosquitto.org/
- Part of Debian or RPi packages. https://mosquitto.org/download/
- Mosquitto public “test” broker: https://test.mosquitto.org/
- Moquette : Java MQTT “lightweight” broker https://github.com/moquette-io/moquette
- Note that most MQTT brokers try to be “comprehensive” with persistence support built on top of some database; there are very very few light Java libraries brokers.
- Apache ActiveMQ: a broker and a client.
- https://activemq.apache.org/version-5-getting-started.html
- https://mvnrepository.com/artifact/org.apache.activemq/activemq-client
- HiveMQ MQTT Client - https://github.com/hivemq/hivemq-mqtt-client
- That looks fairly used, recent, instantly documented in the README with no need to go fishing around.
- https://mvnrepository.com/artifact/com.hivemq/hivemq-mqtt-client
Some interesting things here:
https://forum.mrhmag.com/post/an-operating-steam-throttle-you-can-customize-12548356?&trail=25
I don’t care about the “steam throttle” part. What I do care is this is using:
- A 3d printed case.
- An ESP32 and other arduino-like accessories, such as OLED screens, buttons, etc.
I realize I can use a principle like that for my own contraptions. For example for the ToF sensor for the Software Defined Blocks [research] project, I was wondering whether I should solder pin headers on the sensors and the ESP32 to use. The headers make it easier to prototype, but then they expose contacts that I may not want exposed during the real application -- and once soldered, the headers are impossible to remove neatly.
So here’s what I could be doing:
- 3d print my own case / support.
- In there, have holes for the pin headers.
- This would support the part in the direction I want.
- Just solder connections on the back on the appropriate pins.
- Or use Dupont connectors.
- The soldering can also help hold the part in place.
- It’s still possible to unsolder and remove the part.
The other option I had used before (for the motion sensor at Randall) was to use Dupont connectors for all the usable pins. That can also be worked in the 3d print to make room for only what I need, helping connect to the right pins.
Finally, for something like Software Defined Blocks [research], I’d want the sensor encased in a little box mimicking a railroad “trackside equipment house”, whatever that thing is called. It can just be a 3d printed rectangular box with a slanted root, painted in gray. Example 1. These are called “electrical cabinet”, or “equipment house”, “relay house”, etc.
VSCode > Terminal > use “v” icon > Terminal Settings
or
VSCode > File > Preferences > Settings (Ctrl + ,)
Scroll to Features > Terminal > Integrated > Automation Profile: Windows (or Linux)
“Edit in settings.json” → creates C:\Users\%USER%\AppData\Roaming\Code\User\settings.json
In the JSON section:
"terminal.integrated.shell.windows": "C:\\Windows\\Sysnative\\WindowsPowerShell\\v1.0\\powershell.exe",
replace by:
"terminal.integrated.shell.windows": "C:\\cygwin64\\bin\\bash.exe",
"terminal.integrated.shellArgs.windows": [
"--login",
"-i"
],
"terminal.integrated.env.windows": {
"CHERE_INVOKING": "1"
},
Try it with Ctrl-` (or Terminal > New)
Also copy that in the workspace profile rather than the user-wide profile.
Note that this method is deprecated as now there are “terminal profiles” but it still works.
2023-01-29 - ESP32 Variants Available
Category DEVI have 3 types of ESP32 hardware available around:
- The HelTex WIFI_Kit_32, an ESP32 with Wifi/BT and an OLED screen (I2C).
- IDF config: CPU freq 240 MHz, XTAL 26 MHz, SPI flash 4 MB (no RAM), internal SRAM 520 kB.
- Features: USB serial CP2101, Wifi, BT, OLED (cannot be removed), battery plug.
- Does NOT have: sdcard. No SPIRAM.
- The ESP32-CAM, an ESP32 with Wifi/BT, sdcard, camera.
- IDF config: CPU freq 240 MHz, XTAL 40 Mhz, SPIRAM 4MB (on SPI bus), SPI flash 4 MB (no RAM), internal SRAM 520 kB.
- Features: Wifi, BT, OV2640, sdcard (shared with onboard LED!).
- Does NOT have: USB serial, no OLED. Requires FTDI for access/program
- The ESP-32S …Should have similar specs to the HelTek Wifi Kit 32, without the OLED or sdcard or camera. It has a micro USB and a CP2102 UART. The ESP-WROOM-32 is listed as having a XTAL 40 Mhz in the Espressif docs.
- Features: USB serial (CP2102), Wifi, BT.
- Does NOT have: No sdcard. No OLED. No SPIRAM.