The Randall Museum in San Francisco hosts a large HO-scale model railroad. Created by the Golden Gate Model Railroad Club starting in 1961, the layout was donated to the Museum in 2015. Since then I have started automatizing trains running on the layout. I am also the model railroad maintainer. This blog describes various updates on the Randall Museum Model Railroad and I maintain a separate tech blog for all my electronics & software not directly related to Randall.
2024-01-29 - Iowa Scaled CKT-BD1 Sensors for Mountain Blocks
Category RandallLast year, I was having problems with some of the track occupancy block sensors on the mainline automation. Turns out that the new UP Walthers engines use a lot less power than the previous engines, and the NCE BD20 were having difficulties detecting the presence of the trains.
Instead, I finally finished replacing the problematic sensors by newer Iowa Scaled CKT-BD1 sensors:
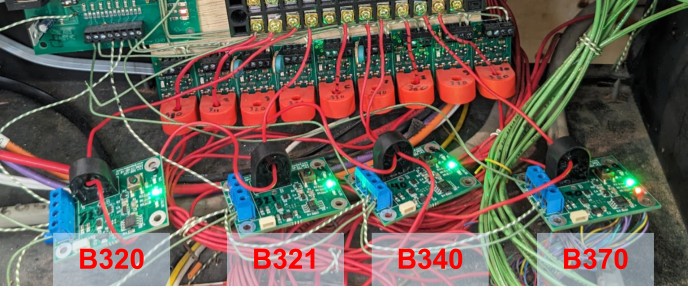
Only blocks B320, B321, B340 + B350, and B370 have the new sensors.
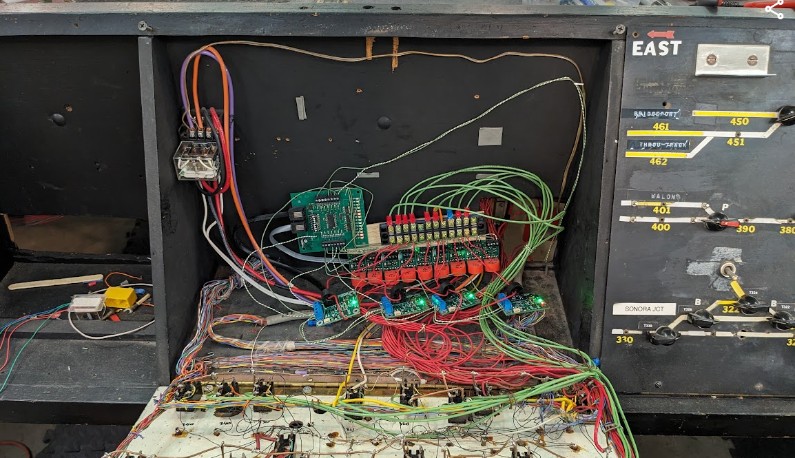
This is located behind the Mountain 1 Block Panel. Quite frankly, it’s a bit of a mess and that install needs an organization overhaul at some point:
Whereas the BD20 sensors were adjusted by an (optional) variable resistors, the newer Iowa Scaled CKT-BD1 are all electronic and embed a smaller ATiny85 controller.
To adjust their sensitivity, the procedure is fairly simple and follows the CKT-BD1 user manual:
- The track needs to be powered, so we want the command station turned on.
- Make sure the track is not occupied -- e.g. turn the automation’s toggle switch off, and visually assert there are not trains, either engine or cars sitting on the track.
- Locate the little push button on the BD1 sensor card for the block to be calibrated.
- There may be a red occupancy LED on -- this indicates the sensor is detecting track occupancy, and if the track is visually empty that means there’s too much current leakage. So that’s why we need the calibration.
- Press and hold the button.
- There’s an orange LED that should start blinking slowly. Keep holding.
- Once the orange LED stays solid, release the button.
- The orange LED should start blinking rapidly 3 times.
- After that, the success depends on the red occupancy LED:
- If the red occupancy LED should go off, the calibration is successful.
- If the red occupancy LED stays on, there’s a problem due to too much current leakage, and at that point we should start worrying and start thinking about reassessing our life goals or something.