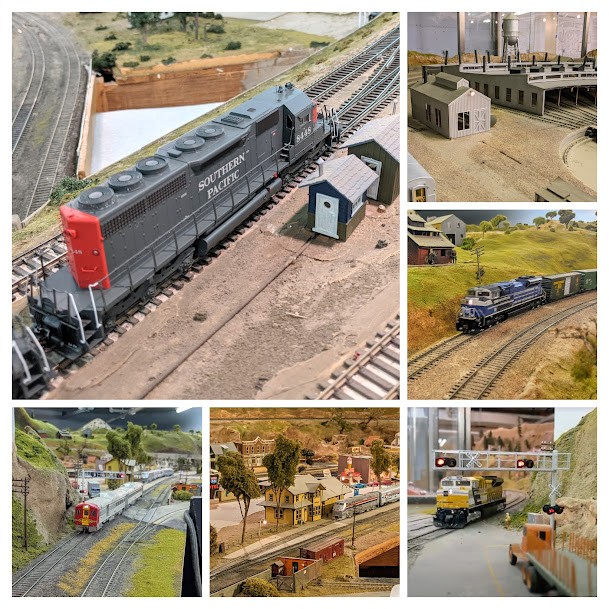
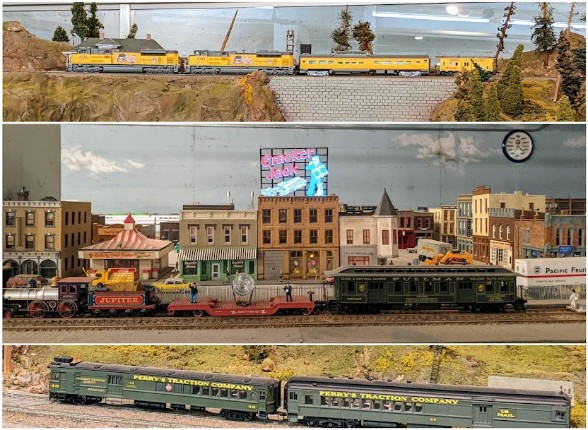
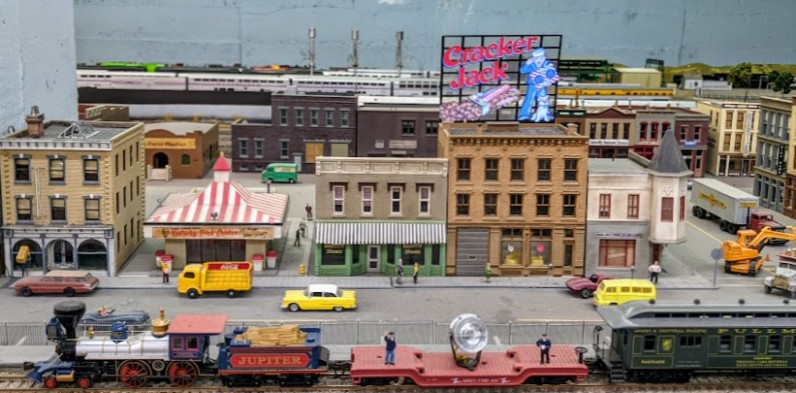
The Randall Museum in San Francisco hosts a large HO-scale model railroad. Created by the Golden Gate Model Railroad Club starting in 1961, the layout was donated to the Museum in 2015. Since then I have started automatizing trains running on the layout. I am also the model railroad maintainer. This blog describes various updates on the Randall Museum Model Railroad and I maintain a separate tech blog for all my electronics & software not directly related to Randall.
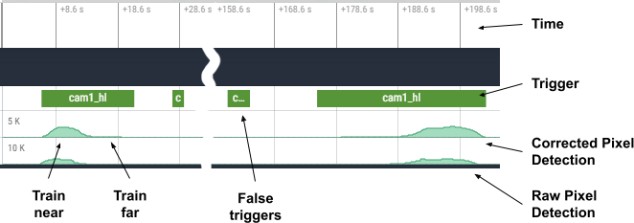
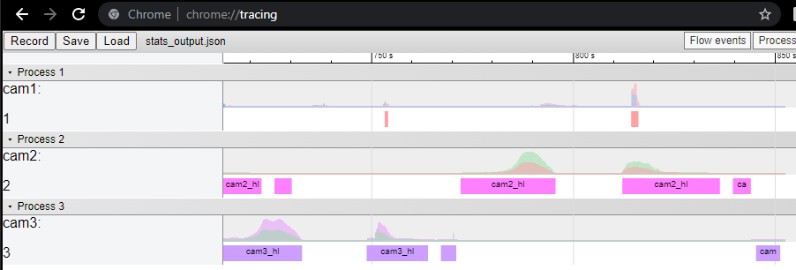
Back in November, I did a major update to the Vision software that drives the Vision computer at the museum for the Train Vision Project. A major issue was the image detection had a lot of false triggers and would erroneously detect a change in the image when there was no motion. I reworked the image analyzer, and I also added logging to capture what motion is detected. The logging system dumps data to a JSON file compatible with the chrome://tracing protocol and the Perfetto web UI, which I can then collect remotely and analyze later.
Here’s an example of run from last Saturday:
What we see above is an automated run from the mainline Freight train. Rows represent cameras 1, 2, and 3 respectively. Let’s look at camera 1 in detail:
Click here to continue reading...
2022-01-10 - Planning for 2022
Category RandallThis year I’d like my projects to enhance the automation. There are two automation additions I want to get to, namely Fairfield and the Trolley line; however I realize these require a lot of research & preparation work that is mostly software and, if I go there, it will be yet another 6-9 months with nothing tangible for others to actually see.
So instead I’d like to focus on enhancing the variety of the current automation.
1- Branchline Automation
We currently have a single engine running, and we park it on the B811/B801 storage track. However the track & panel supports 3 storage tracks.
Branchline/Mainline Track Diagram (blue is mainline, green is branchline).
Click here to continue reading...
I’ve spent some time updating the Randall Documentation git repository. What’s changed:
- There’s a new hardware folder.
- Currently it only contains the PFM Fulgurex documentation.
- I plan to add more to collect the user manual of all the hardware we currently use on the train layout, from the command station, to the various electronic boards such as auto reversers or electronic circuit breakers.
- There’s a new ggmrc_history folder.
- This contains paper documentation I found on the layout’s archives. I scanned them all a few years ago. Scan quality was so-so; image contrast is really poor on many of these. I tried my best to find what they describe and rename them accordingly.
I was particularly interested in the historical documents I could find. They cover a wide time range, from 1965 up to 2010.
Layout wiring standard “adopted June ‘65”.
However these documents are a mixed bag. Some are early design schematics for the mainline or the yards, which may or may not be relevant today. There are some early construction standards for the layout. Others describe equipment which is not there anymore. There are a few yard or panel descriptions that I could not quite relate exactly to the layout, so these are labeled as ‘unknown’.
Click here to continue reading...
On the software side, while traveling during the xmas break, I have spent time cleaning up the Conductor source code, which is my script-based software that drives the entire model layout automation. I have not changed any functionality, just done maintenance on the code base; I have modularized the code to split the parser and the script engine into an engine module, and I have updated all the dagger components to make it easier to write tests for just the scripting engine.
I have remotely deployed the new version on the layout, and as desired this update was totally silent and unnoticed.
On the train model side, we’ve had issues with the Branchline for a little while.
Last month, the 2-car Santa Fe RDC from Rapido stopped working. I “solved” that by just running it with only one of the two RDC cars. The unit is also not doing sound anymore, at least not in a consistent manner. That’s unfortunately the second Rapido RDC unit that developed similar problems. The small motors they use for each truck is apparently the weak link, and since they use two of them, the unit can’t run well once one of the motors fails. For the RDC SP 11, I worked around that by disconnecting one of the motors, making it single-truck powered, which is fine on our flat branchline. I could do that too here, however it won’t solve the sound issue (it does make sound from time to time IIRC so it’s not a speaker/wiring issue, maybe more like a decoder issue).
The other way I “fixed” the branchline automation is by thoroughly cleaning the engine wheels and then scrubbing the track where it was losing power with the Walthers hand cleaning tool.
But at some point we need to just work around the problem and address it. Time for an engine/train change on the branchline.
There’s a similar issue on the mainline. The trains were not stopping at the right spot, and that got solved by cleaning the engine wheels. But more importantly, we’re going to have to swap the engines at some point. Out of the two UP SD70ACe engines, one is out of commission, and I’m currently running with the backup UP 8749. There is no backup for the backup so we’ll need to deal with that.
The easy solution here is to try to get yet another UP SD70ACe once available. Currently Walthers or TrainWorld have none though. In any case, one of the many pending tasks I have is to look at what’s wrong with the first unit and fix it. What I have done in the past that worked well is get any similar unit from the same OEM and just do a shell swap.
2022-01-01 - Happy New Year
Category RandallHappy New Year 2022 from the Randall Museum Model Railroad team.
2021 was yet another odd year. It was marked by the museum reopening in October. The usual lot of mandatory layout maintenance happened with various things to fix (B91, B320, B321, T150, T320, T450, etc). Some new stuff happened like balloon auto-reversers for Bridgeport yard, and a good amount of time spent understanding the lighting.
Click here to continue reading...
I’ve spent the last couple weeks doing background computer maintenance mostly. The kind of stuff nobody at the layout will notice, because things magically get fixed before they are too broken.
If you don’t like computer stuff, you can skip this one as we’re going to get deep in the weeds with Linux commands.
Click here to continue reading...
I keep all the source code and configuration files related to the automation in git repositories on Bitbucket. At first I was using my private workspace, and I finally moved the various projects into a proper dedicated workspace:
https://bitbucket.org/model-railroad/
This now contains three repositories:
- conductor: The main repository that holds the various projects used for the train automation of the railroad exhibit. Most notably it contains the sources for the Conductor software that drives the automation, the RTAC program that runs on the Android display tablets, and a few other Arduino/Pic16f projects.
- vision: The software that runs on the Vision computer at the museum, playing recorded videos, and also playing live feeds from cameras located around the layout.
- randall-documentation: This one is totally new. I moved here all the public documentation I have for the Randall Museum Model Railroad.
The documentation repository contains files for layout maps, layout schemas, layout labels, and all the documentation I wrote for the museum staff and the Saturday Operators. I do have links to that in the introduction page however all the source material was just on my own drive. Now it’s properly archived as it should with proper revisions. One goal of having a public repository is to have volunteers submitted patches to extend it. For that purpose I’ve clarified in the README the license and the file formats that can apply here.
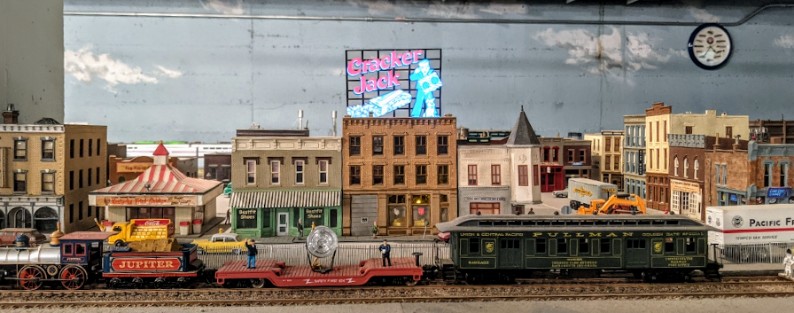
Today Allen and I finally got the “Cracker Jack” illuminated HO-sized billboard powered by the layout’s building lighting panel:
Even with the full room lights on, it’s still quite visible and should be a nice animation for visitors:
Back in June, Allen got the billboard and we temporarily installed it, yet it remained unpowered. The sign can be powered via a battery and instead I wanted it connected to the layout’s building lighting circuits using an Adjustable Voltage Regulator.
That project took a bit longer than expected -- first I plugged the voltage regulator in reverse (thus increasing the voltage instead of reducing it), and that killed the billboard’s control board. So I got a replacement for that, and this time wired it up correctly. Allen and I made the building self-contained with the voltage regulator and I tried adding an orange LED inside to add some scene lighting, which honestly didn’t work and is quite sub-par.
Click here to continue reading...
Concluding 4 days of work, this morning I installed the new version of the vision software on the Vision computer at the museum for the Train Vision Project.
The project has three cameras looking at the layout and displays live videos when it detects trains. In the initial version, that video was really choppy. It was fine when I was experimenting with this on the wifi at home, but the same cameras + laptop resulted in a really bad frame rate when using the sub-par wifi in the train room.
So I spent the Thanksgiving break entirely rewriting that part of the software. In the previous version I was using the FFmpegFrameGrabber to get the cameras’ RTSP h264 feed, analyzing the frames for motion, and then feeding them to the display by drawing them directly with a Canvas in a JPanel. That was really not optimal. In the new version, I replaced the custom viewers by instances of VLCj in Direct Rendering mode, so now I have VLC driving the RTSP feed, and I use the reverse where the VLCj decoded frames are fed to the motion analyzer. They all work in their respective threads with blocking queues for synchronization.
The result is that the videos are really better looking now. Not choppy anymore. I also reconfigured the cameras to boost the contrast and saturation as the image was rather bland -- I overdid that part a tad much, I need to tune it down now.
The only downside is that CPU usage really went up, which makes sense since I now have 3 VLC viewers in 1280x720 @ 15 fps doing their work where before I had 3 meager 640x480 feeds at some very irregular frame rate. But that’s fine, because now I can underclock the analyzer threads and run them at 5 fps -- they don’t need to detect motion on every single frame. Overall the software now runs at 50-75% on the 4 CPU i7 cores which is on par with what I had before, but with better quality.
The last thing I’ve done is add a statistics collector for debugging purposes that can export the motion events to the chrome://tracing json format:
That should allow me to fine tune the motion detection thresholds.
I’ve done some work on the Vision computer to get more reliable networking. The USB-to-ethernet adapter hasn’t been behaving as stable as I’d like to, and I fixed the wifi so at least I got that.
But maybe it’s not just that USB-to-ethernet adapter that needs some more work though -- last time I went by the museum, all the port lights were off on the ethernet switch till I power-cycled it so maybe I should look at that first.
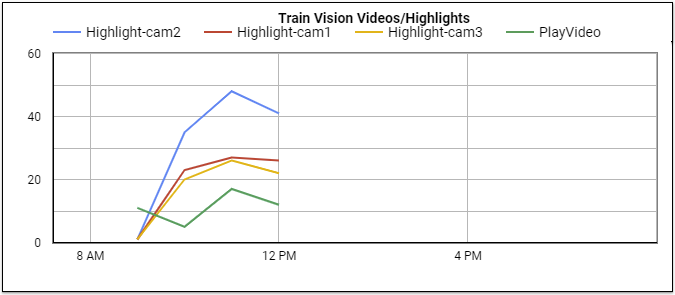
I have also updated the highlighter’s logic in vision, and actually I like the updated logic even less than the original. Look at these stats:
That’s terrible. Too many highlights. The thing is too sensitive, I need to change it to have some kind of adaptive threshold. Some of the highlights happen when no trains are moving, probably because the RTSP h264 stream is of subpar quality and very noisy, not to mention noticeable inconsistent frame rate. That’s why I need that wired ethernet to work.
And what’s up with the lack of stats after noon? I know the laptop was running at least till 4-5 pm. If it were a 12/24 hour mismatch, the “12 pm” events should look like midnight (12 am) and the 4-5pm events should look like 4-5am, which is not the case here. More mysteries.

