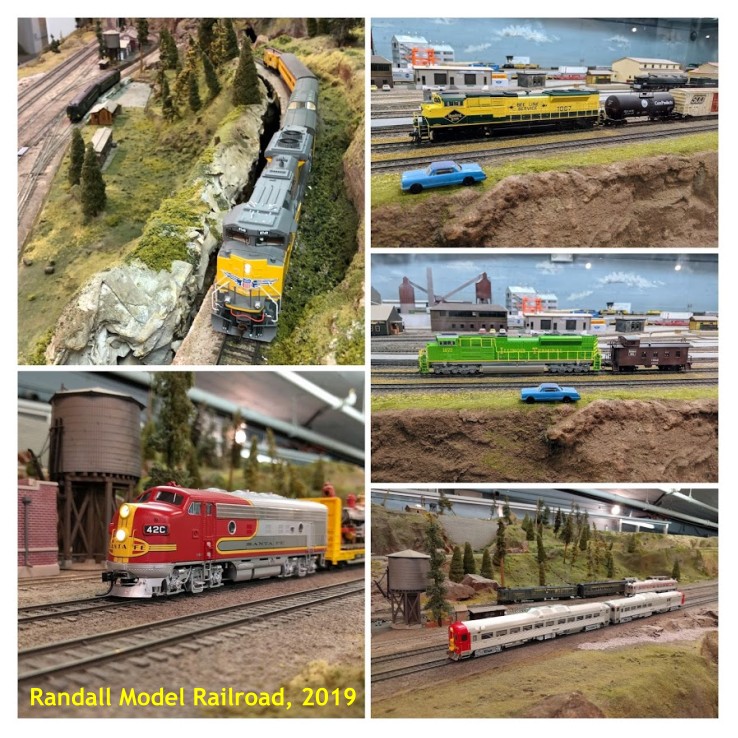
The Randall Museum in San Francisco hosts a large HO-scale model model railroad. Created by the Golden Gate Model Railroad Club starting in 1961, the layout was donated to the Museum in 2015. Since then I have started automatizing trains running on the layout. I am also the model railroad maintainer. This blog describes various updates on the Randall project and I maintain a separate blog for all my electronics not directly related to Randall.
I’m continuing trying alternate views for the cameras for the Train Vision Project. This time I’m still using the same good ol’ Edimax IC-3116W 720p cams I had around from 2015. They work well, and have the added benefit of having an ethernet plug so I can transfer the video over wired ethernet instead of saturating the limited wifi bandwidth.
This time I’m trying to change the Valley camera. In the initial project phase, I temporarily placed the camera by Fairfield, mostly because it was easy to access and we had a view of the automation trains -- which was an excellent tool to configure the Train Vision Project. Yet that was merely a placeholder. The real goal of the project is to provide a view of the layout that visitors cannot readily see from their public view area. One such area is the top of the mountain -- covered in the previous blog post -- and another such area is the Lodi town in the back.
Here’s one such attempt:
And viewed from the Vision laptop screen, this is the lower right quadrant:
Click here to continue reading...
I got a new camera for the Train Vision Project. The current ones I’m using are refurb Edimax IC-3116W 720p cams I had around from 2015. They work well however they are quite bulky.
The new one I’m trying is a small TP-Link Tapo C110. It’s a 1080p no-frills camera which I run at 720p. I particularly choose these since they have official RTSP support, which in layman terms means the laptop can grab the video feed from the camera directly over the local wifi without involving a remote server. The camera is fairly small and light and setting it up with the TP-Link Tapo phone app was a breeze.
In the Train Vision project, one thing I wanted was to have a view from the top of the mountain and one from the Lodi area -- two areas where visitors cannot readily see the tracks right now. I do have the Edimax cams setup next to the visitor area as a placeholder but these don’t add a lot of value since these are areas the visitors can already trivially watch. The point is to highlight parts of the layout out of view from visitors, and that’s where having a smaller lighter camera that I can blend in with the scenery comes in.
I’m experimenting with a view from the top of the mountain:
Here’s the view from up there:
Click here to continue reading...
I installed a new NCE USB Interface for the JMRI laptop on the workbench. The last one got wet during the last rainstorm and I wasn’t able to revive it. The new one is wrapped in a little plastic wrapper to hopefully prevent it getting taunted a second time.
To help against the next rain season, Allen and I reorganized the protective tarp on the ceiling. The arrow highlights the source of the leak from the concrete ceiling. It is a small dripping leak, yet persistent enough to do damage to the wood workbench and all the equipment.
Not pictured here, we have a large bucket at the front that collects dripping water.
And yes the museum direction is well aware of the core issue. That’s how we got the tarp to begin with, as that imaginative yet hopefully temporary solution was installed by one of the museum coordinators while we wait for official repairs to happen.
Here’s a schematic representation of the Randall Museum Model Railroad track:
The dark line indicates the current running direction. Green blocks are features in the Mountain division, and yellow blocks are features in the Valley division. The two secondary yards with their balloon reversing tracks are denoted in blue. Stockton Yard is the staging yard and starting point and is denoted in red.
Now the schema above is a bit messy as it vaguely represents the physical location of each feature in the room, with the track that keeps crossing over itself lots of times via bridges and tunnels. I even omitted the Branchline, which confusingly adds another reversing loop from Sonora back to Stockton Station or Stockton Yard.
However, since we mostly have a single mainline running loop, we can reorganize the schema and simplify it as follows:
This track schema is strictly equivalent to that spaghetti mess above.
Here it’s easier to see that Saturday operators basically run a glorified 4x8 oval loop, with two yards providing balloon tracks.
Now this opens some interesting operational considerations.
Click here to continue reading...
The Branchline has been running the Rapido Santa Fe RDC 191+192 for quite some time. Then it was 191 alone as the other engine stopped working. And then there were none. Then I programmed and tried the steam engine MoPac #153 2-8-0. Well that one didn’t last one day and although I fixed the original source of the derailment, I was still fairly skeptical of running a 2-8-0 on a tricky sub-par track like the Branchline.
Thus Jim suggested yet another engine & caboose from his extensive collection:
This one is an SP&S Alco RS-3 #4070, and it seems to be this Bowser model. I think it sounds and looks great.
As a bit of history, SP&S is the Spokane Portland & Seattle, which merged into Burlington Northern in 1970. #4070 is the post-merger number and that dates the model to 1970 or later.
I updated the programming script to run with #4070. Later I enabled lighting effect F5 for the cab gyro light, and a bit later I programmed the caboose directional lights to automatically match the engine’s direction.
I really like the result. Engine sound is great. The horn/bell are a bit muted and I might put that on the programming track to see if I can adjust their levels once I fix the broken NCE USB interface.
I also think the Alco RS-3 is a great engine for the Branchline. Prototypically these engines were great runners on short lines and their sub-par track. And in the model version, I find them also very stable on such model tracks. Plus everyone can agree that any Alco RS-3 looks fantastic with its beveled engine hood and cab.
The Branchline has been running the Rapido Santa Fe RDC 191+192 for quite some time. Then it was 191 alone as the other engine stopped working. And then there were none.
Jim suggested to try something different so we did:
I apologize for the poor video & sound quality as I shot this on the phone.
This is running a MoPac #153 2-8-0 Consolidation engine. It does sound great, although running characteristics are not ideal for the slow speed needed for the Branchline.
The other issue is that the track on the Branchline is quite subpar, it’s not always as flat as it should be, the dual-gauge turnouts are tricky, and the track has just too many quirks. For example one is very visible in the video above when the engine starts from its interchange storage track, there’s a very visible elevation change when crossing some of the yard turnouts. Then in the canyon tunnel, there’s a kink in the track -- 2 segments of flex tracks that have been soldered not straight, forming an abrupt angle. It’s enough to derail quite a number of light cars or engines.
Click here to continue reading...
Affected |
Turnout T840 on Branchline (Smith Flats towards Gravel Pit). |
Description |
Throw switch rod doesn’t close. Track out of gauge. |
Summary Fix |
Spike throw switch rod in place. |
Description of Issue
We have been trying to run MoPac #153 on the Branchline in automation. It failed on T840, which is just outside of the canyon tunnel leading to Smith Flats / Bear River section on the Branchline. The engine was running in reverse direction when the car & tender followed the track yet the steam engine went straight through the turnout:
The issue is even more clear from an aerial picture shot:
Click here to continue reading...
2022-03-27 - Update
Category RandallRecently I have been exploring my latest DIY experiment: a homemade “dead spot detection car”.
Click here to read the corresponding post for more details on this contraption.
Not a lot has been happening lately, at least nothing visible. I did an update on the Raspberry Pi controlling the automation wifi network, and I also revived one of the wyze cams that had gone unresponsive and offline again.
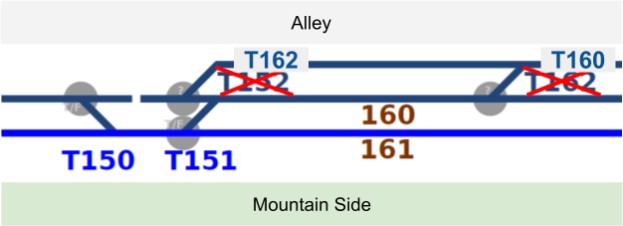
Finally I’ve been revisiting my plans to add more block detection on the Branchline as I plan to tackle that project shortly -- there’s a lot of planning that goes upfront here, and it starts by poring over the pictures of the electrical connection terminals, and trying to guess or decipher what is and isn’t there. I detected some inconsistencies in my Branchline track schematics.
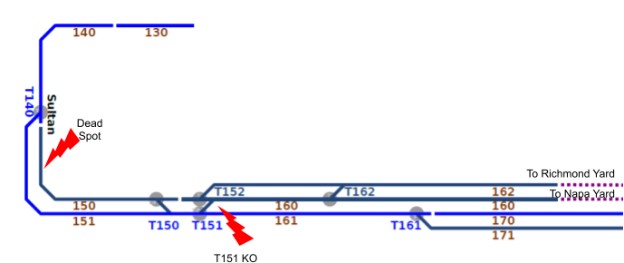
We have two spots on the layout where we have experienced episodic dead spots -- loss of track power that seems to fix itself. I suspect some rail or solder contact that works or doesn’t work based on the temperature and humidity. I’ve fixed a couple of these and each time I need to experience the dead spot to figure where it originated from. It’s hard to fix something when that thing just plain works.
Yesterday, a new such spot appeared, at block B100 between Lodi and Fairfield. Allen was able to work around by bridging the gap between B90 and B100 using a screwdriver, thus powering B100 from B90:
I’m a big fan of such creative workaround to keep running.
We closely examined the track today, and identified the block boundaries. Unfortunately there was no dead spot today, the track was working fine, and we found no culprit to this issue. There’s a track feed a couple feet before, and the solder joints seem sturdy and nothing breaks when the track is flexed or the wires are jiggled around -- a proven rigorous scientific approach to identify such issues.
We also examined some other spots where we have had engines stop-and-go on specific turnouts. I posit some have to be due to resistance from the powered frog contacts on the switch machines. However measuring a few spots revealed nothing useful. It did not help that today engines were not hesitating on these spots either.
It’s quite annoying when everything works, ironic, isn’t it?
Later, we looked at a known issue with engines losing power when crossing turnout T221. Looking at it and testing it with the voltmeter, it became quite obvious:
The entire frog is unpowered on this turnout -- everything in the middle “X” part till the two round pivot joints. The closure rails (the ones that move) seem powered only by contact with the stock rails. There’s also no sign of any power pick up anywhere on this turnout. It’s really entirely unpowered. That means most trains stop on this turnout unless they have multiple units, or long wheelbase engines such as these long SD70s.
The turnout looks to me to be an Atlas turnout, due to the typical two tabs next to the throw bar. On Atlas turnouts, these two tabs with their little middle hole are used to attach a side twin-coil turnout machine.
If we wanted to fix this, we would have to power the frog and the inner closure rails. To do that, the twin-coil switch machine under the layout already has the contacts that can control the frog power but we’d need to pick up power from the stock rails, and somehow solder the “outgoing” power feed to the frog. Many turnouts have solder points on the underside to create such connections, and obviously here we’d have to do it from the top. It’s some work but it’s definitely doable.
A quick search on powering frog on Atlas turnouts indicates the frog is “pot metal” and won’t take any solder, however there are holes next to it just for that purpose and one would make contact by using a “2-56 screw” in there. An indeed there are two holes right next to that frog:
Some work has been made on the string of fluorescent lighting on the sides of the room. The two strings of ceiling fluorescent tubes with their 60s-era ballasts on both sides of the room had all mostly failed over the last four years, rendering the two side alleys quite gloomy.
All the credit goes to Chris, Director of Randall Museum, who performed all the work on his own, independently of our regular volunteer maintenance work.
A month ago |
Today |
It’s notably better over Stockton Yard and the middle of the mountain area -- the before/after pictures don’t quite express the stark difference since the cameras obviously compensate for overall luminosity, however it’s quite clear there are a lot more shadow areas on the before pictures.