Model Train-related Notes Blog -- these are personal notes and musings on the subject of model train control, automation, electronics, or whatever I find interesting. I also have more posts in a blog dedicated to the maintenance of the Randall Museum Model Railroad.
2018-05-10 - Conductor 2: Desiderata
Category Rtac
How would a Conductor 2 differ from the current version?
Requirements
- Simulator.
- Validation via tests.
- Visual feedback from internal tests, both real and simulated.
State:
- Define JMRI turnouts.
- Define JMRI block sensors.
- Define map graph.
- Define virtual blocks.
- Define routes.
Click here to continue reading...
2018-04-21 - Mobius Action Cam vs Runcam 2
Category Video
The latest video I did was an update of the full “cab ride” layout tour of the Randall Museum layout.
In the past I’ve used the same camera as for all my previous cab rides, a Mobius Action Cam. When I tried to use it after a year of inactivity, I realized the battery is dead and won’t hold a charge for more than 10 minutes. I can order a new battery, but maybe it was worth looking at what had changed in the domain in between. Let’s look at the Runcam 2.
Click here to continue reading...
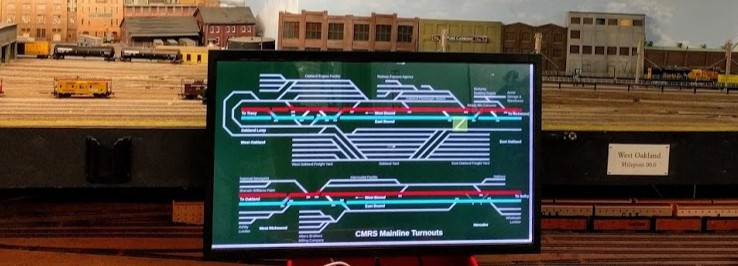
2018-01-21 - Turnouts Touch Panel for JMRI at CMRS
Category CMRSSome members at the CMRS train club (the Carquinez Model Railroad Society, in Crockett, CA) desired to have large touch panels that members could use to toggle switches on the mainline. For testing, one of the members procured 32-inch touch panels and I wrote a quick experimental software to display the mainline on it and control turnouts based on touch.
The touch panels rely on the main JMRI server to trigger turnouts on the mainline.
This post documents my first prototype demonstration for this project. This was going to be an iterative process as I expected to incorporate feedback later. What I came up with is fairly easy to reuse for other layouts -- I’ve implemented something similar at Randall just after, so I’ll explain how it is implemented in the hope others want to use that or get inspired by it..
Click here to continue reading...
2017-10-31 - NCE AIU and Short Trigger Events
Category NCE
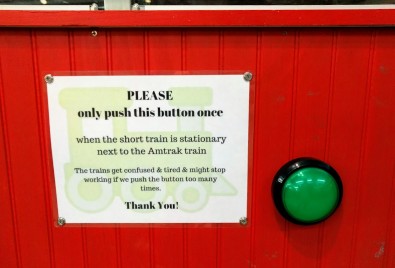
On the Randall layout, visitors press a button to trigger the trains’ automated sequence to start. Very quickly we noticed that sometimes the system would fail to notice the button was pressed.
We use a large button but that’s irrelevant. The issue has to do with how long it is pressed. Most people give a quick short push, and that’s the problem.
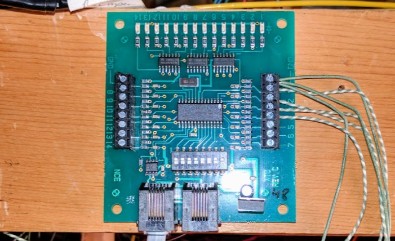
The button directly closes the contacts on an NCE AIU01 (Auxiliary Input Unit), which is regularly polled by the NCE command station. The computer runs my Conductor software which polls JMRI for the status at at least 30 Hz. The AIU01 is polled by the NCE Command Station at an appalling low refresh rate due to the NCE cab bus implementation: if an input doesn't trigger long enough (e.g. 1 second), it will be easily missed. In this case, it’s enough to give a short but quick push to the button and most of the time miss the polling window. The event is simply missed.
Question is what would be the simplest circuitry possible to make an input trigger longer?
Click here to continue reading...
2017-04-12 - Powering a LED off DCC
Category DCC
Very interesting discussion here: http://cs.trains.com/mrr/f/744/t/230553.aspx
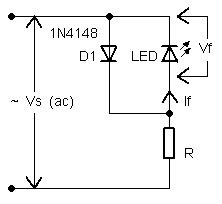
Summary, TL/DR: We can power a LED directly from DCC, just add a resistor to limit to about 10 mA (or less if too bright).
Suggestion is "nice to have" a reverse parallel diode to limit the reverse voltage on the LED:
However another comment indicates it's enough to compute R to be within the specs of the reverse voltage of the LED (assuming I have the specs).
Click here to continue reading...
2017-04-10 - Layout #3 “Test Track”
Category Layout
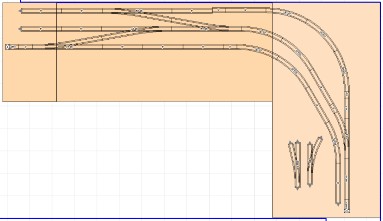
I tore down my previous layout #2 since it didn’t have a purpose anymore -- originally it was for the kids to play with and for me to play with cameras recognition of trains and automation. I’ve done my part, and the kids didn’t show interest anymore. Being a 4x9”, it was still taking valuable space in my small room. Time to update.
What I cared for is having a workbench and a simple test track on top of it. I came up with a very simple L-shaped workbench design. The workbench is designed to not have any legs in the way and lots of storage space underneath. For the test track, I have a bunch of EZ-Track around so I just used that. It’s suitable for minor switching. I won’t add any scenery, it does not need to look like a shelf layout since it’s a workbench.
Click here to continue reading...
2017-01-16 - Conductor Automation Software
Category Rtac
“Conductor” is the name of the software that controls the automation on the Randall Museum Model Railroad. It’s written in Java and integrates into JMRI. The other part is the Android tablet display software. Combined, both create “RTAC” -- the Randall Train Automation Controller. I started the conductor project in mid-2016 and by the end of 2016 I had a working version deployed on the layout at the museum. Immediately after that, I started thinking about extending it already :-)
The RTAC / Conductor source can be found in this git repo https://github.com/model-railroad/conductor with a GNU GPL v3 license.
--
Here's a rethink of the automation software.
Right now I have JMRI for sensor management and DCC throttles. Conductor acts as a plug-in that drives the automation purely on sensor+timer event based script.
Click here to continue reading...
2016-12-01 - IR Sensors
Category Electronics
To detect trains on the branchline, I experimented with using IR reflective sensors instead of block detectors. These have the advantage that they are inexpensive and can be connected directly to an NCE AIU01 board.
The original idea was to embed the sensors in the track bed. The sensors are fairly small and fit nicely between ties. The one chosen have a detection range of 2-15 mm, which would be ideal to detect when an engine truck passes over the sensor.
The IR reflective sensor used are TCRT5000. The Vishay spec can be found here.
This model is nothing more than 2 separate "LEDs" stuck together in a flimsy small plastic shell. They can be easily removed from the plastic shell and mounted in the track flush with the ties, pointing upwards (technically one LED is an emitter and the other is a receiver so calling it a LED is abusing the term, although it may look like one).
The photodetector on the TCRT5000 varies its current based on the amount of light received. No light, no current; lots of light, more current. The amount of light that bounces and the collector current depends on the distance between the detector and the object. The nominal distance is 2 millimeters and experimentation showed that I could get away with much more.
One of the LED is an emitter and needs to be powered by 5 V and a resistor (to limit and adjust the current). The other side is a phototransistor, NPN type.
How is the IR sensor going to connect to the NCE AIU01?
Click here to continue reading...
2016-10-11 - JMRI Logix
Category Jmri
Looking at JMRI Logix, this is a non-script click-o-drome if-this-then-that.
Conditions range from block, sensors. Actions are signals, turnouts, scripts or warrants.
Conditions can act when set or on change.
No direct throttle control, maybe indirectly via warrant scripts to run "auto trains".
One possibility is starting a script when some condition happen.
Seems interesting for people who don't want to write scripts. Tons of clicking to get things done.
Seems ideally suited for simple linear decision trees, not for free-form scripting.
Examples would be signals or turnouts set depending on block usage.
For my automation purposes, it seems fairly weak and I’ll design my own software that uses a text file for configuration. Somehow it makes non-tech people very nervous and Windows users especially seem to enjoy clicking ad nauseum in poorly designed modal dialog boxes instead of having a single text file script they can look at quickly.
2016-10-08 - NCE Limitations
Category NCE
https://ncedcc.zendesk.com/hc/en-us/articles/200933425-Common-Cab-Questions
- The NCE PowerCab / DCC Twin can only use cab bus addresses up to 10.
- 0-1 are the internal twin cabs.
- 2-7 are for throttles.
- 8-9-10 are for cab devices.
- The NCE AIU01 can use only cab bus address 4 or 48-63. That means effectively on a PowerCab bus it can only use address 4, there can't be more than one on the whole bus. Quite disappointing but OK enough for home since I had no plan to have more.
Click here to continue reading...

